


Simplified MFG Tech Bulletin

Tech Bulletin 8/12/2021
Subject: ARC and eARC issues in general Bulletin #1
Issue(s): ARC not working with CEC turned off and other general issues
Indicators: The system is being controlled by the CEC and unwanted things are happening or the availability of ARC is inconsistent
Products affected by this: Nearly any display with ARC or eARC functionality
Example of issue Number 1:
End user could not make ARC function correctly from a Sony display to another brand of AVR. The issue was CEC commands kept making the system unusable.
Solution:
The Bravialink was disabled which disables the ARC. Then the eARC mode was enabled and ARC is backwards compatible making the ARC work without the CEC problems. This is counter intuitive is as many things are in the eARC/ARC world.
Example of Issue number 2:
No ARC on Visio branded display, appears to only have eARC.
Solution:
When the eARC is disabled the Visio display defaults back to ARC as long as you are in the HDMI input marked “eARC”
Side note:
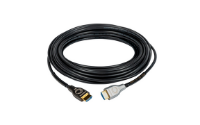
ARC was not used very often due to CEC. Now that the audio breakout is disappearing on many displays, we are seeing a resurgence of ARC and the superior eARC format. Many HDMI cables were being created and in our opinion without concern for ARC and eARC. Most issues outside of settings in the display are HDMI cable related. It is HIGHLY recommended that HDMI 2.1 cables are used in these situations as eARC is part of that format and they should be tested accordingly at the HDMI cable manufacturer.
How to trouble shoot the EXeARC1 (PDF): ARC and eARC are sometimes counter-intuitive in how it operates so I created a guide to help. We also added a page on the EXeARC1’s webpage showing the AV signal flow and the ARC/eARC signal flow. Be sure to look at page seven as there is an explanation of the LED indicators on all of our extenders. These LED’s will solve the issue 9 out of 10 times if you know what they mean. Now you will!
Tech Bulletin 7/1/2021
Subject: Altice Cable Boxes with Samsung (and possibly others) displays UPDATE See end note
Issue(s): Altice Cable Box has sound for a second or two and sound goes away when using extenders between them and a Samsung display (possibly others)
Indicators: The system may have been operational until some sort of update, either a component change (Display, STB, or Extender), or online update. System losses audio after this change. In some cases, the audio works for a moment and you will then see a message that states the system is optimizing the picture/sound and then the audio is gone at the initial install.
Products affected by this: Any digital extender that is HDMI 2.0b from most if not all manufacturers. This can happen when using AVR’s and Matrices as a video switch as well.
Solution: The CEC (Consumer Electronics Control) is the culprit. In the display menu you will need to follow this path; Settings → General → External Device Manager →Anynet+ (HDMI-CEC) (May be listed as something else like “external device control” or “Input Signal Plus”as well). Make sure that it is turned off. There may be other options in the menu depending on the build date and version of Display/Firmware. The end goal is to tell the display to stop communicating CEC commands to the STB and causing the audio issue. This is entirely done in this menu and at the display. The audio will revert to “normal” when you have deselected the correct option.
This is an update to a previous tech bulletin on 6-3-20 about Samsung CEC issues. Watch for updates as we find more out about these products being used together. The good news is that once corrected, the system will operate and be ready for any 4K device that you may add. It is possible that there will be an update to correct this from Samsung. It is also possible that an update can turn back on the CEC and cause this issue again. Other things that can trigger this, is the end user getting into the menu and/or adding devices to the system that have the CEC enabled.
*Please note, it appears that other models are affected as well. We found the same issue in a UN50TU8000 display. The display comes on and after a couple of seconds, a message pops up on the screen saying it is “optimizing the picture or the display” and this is when the display makes an adjustment and the sound goes away. In this case the installer stopped this from happening and the display continues to work correctly. It appears to operate in the eARC input. Please note that this happened with an older Scientific Atlanta cable box as well. In short, expect to see audio weirdness with set top boxes and Samsung displays. The failure happens when the message pops up explaining it is optimizing the picture. It is only up for a few seconds and is really hard to catch, you have to be paying attention.
We have found this to happen on nearly all extenders out there. The good news is that it is a menu setting and nothing more elaborate. Hope this helps, we will update as we find out more.
I spoke to Samsung directly and I am convinced it is the cable box misunderstanding basic EDID and CEC requests from the display. Samsung explained that the Input signal + setting was only for 4K and that a 1080p Set Top Box should ignore it. The reason for this update is that Samsung will also search the HDMI inputs to try and understand and control them. If the language is not understood, this too can cause issues. The gentleman at Samsung gave me this procedure to turn that feature off as well, I am would suggest it if the cable box is your only source and if you do care about identifiers in the home screen (I don’t).
Procedure:
Using an IR remote, point it at the display and press this key sequence; Mute, 729, Exit. This will turn off this feature and prevent it from searching in the future.
Samsung TV Tips and Tricks
HDMI Auto-detect
If you are using an HDMI switch or you’re using a receiver as an HDMI switch you may want to turn off HDMI auto-detect. Do not expect an acknowledgement from the TV. Turning this on and off is a toggle. If you do it twice, you turned it back on.
Using the smart remote: While the TV is on the TV tuner input, press the following buttons in order (just press and release): Mute (press straight down on the volume rocker) – Vol Down – Ch Down – Mute
Using an IR Remote: Mute – 7 – 2 – 9 – Exit
Power On to a Specific Input
If you’d like the TV to always select a certain input upon Power On do the following:
Using an IR remote: While the TV is on, press the following buttons: Mute – 1 – 1 – 9 – Enter
Select Hospitality Mode On
Select Power On Source: (select input)
To exit the menu, power cycle the TV
Show TV model, Software and Serial number
With the smart remote: Press and hold the Play/Pause button until the window pops up.
Hard reset a TV
With an IR remote: While the TV is in stand-by press Mute – 1 – 8 – 2 – Power.
Select Option
Select Factory Reset
You’ll be back to the set-up wizard and you’ll have to reenter user names/passwords for any apps that are being used.
Flip the Video Image
If you want to create a 2x2 video wall using consumer TVs, some CI’s hand the top two displays upside down to they have the smallest gap in between displays. In that case you can flip the video image in a Samsung TV rather than have your video matrix device do it for you. You should get better performance by letting the TV flip the image.
With an IR remote: While the TV is in stand-by press Mute – 1 – 8 – 2 – Power.
Select Option
Select MRT Option
Select Image Flip in the left hand column near the bottom.
Select HV Flip
Turn off the TV to exit the menu. When you turn it back on, your video image should be flipped.
One Connect Cables
For Frame TVs you can use either of the two cables:
VG-SOCR15/ZA 15 meter cable
VG-SCOR85/ZA 15 meter cable – this cable is thicker than the other cable and will not fit in the channel guide on the back of the TV…but it works perfectly fine.
For 2021 8K TVs
The two cables above will not work on the 2021 8K TVs.
VG-SOCA05/ZA 5 meter cable is the only option.